

How to set up SSO
OIDC provider configuration
First of all, you need to set up your OIDC provider with the correct Edgee URLs.- Open the Edgee console and navigate to your organizations’s Settings panel.
- Select Single Sign-On from the left-hand menu.
- Find your OIDC Values at the top of the page:
- Redirect URL: This is the URL where users will be redirected after logging in. It looks like
https://www.edgee.cloud/sso-callback/{OrganizationID}. - Login URI: This is the URL that your OIDC provider will use to initiate the login process. It looks like
https://api.edgee.app/auth/oidc/initiate?tenant={OragnizationID}.
- Redirect URL: This is the URL where users will be redirected after logging in. It looks like
- Use these values to configure your OIDC provider. The exact steps will depend on the provider you are using. Generally, you will need to create a new application and enter the Redirect URL and Login URI as part of the configuration.
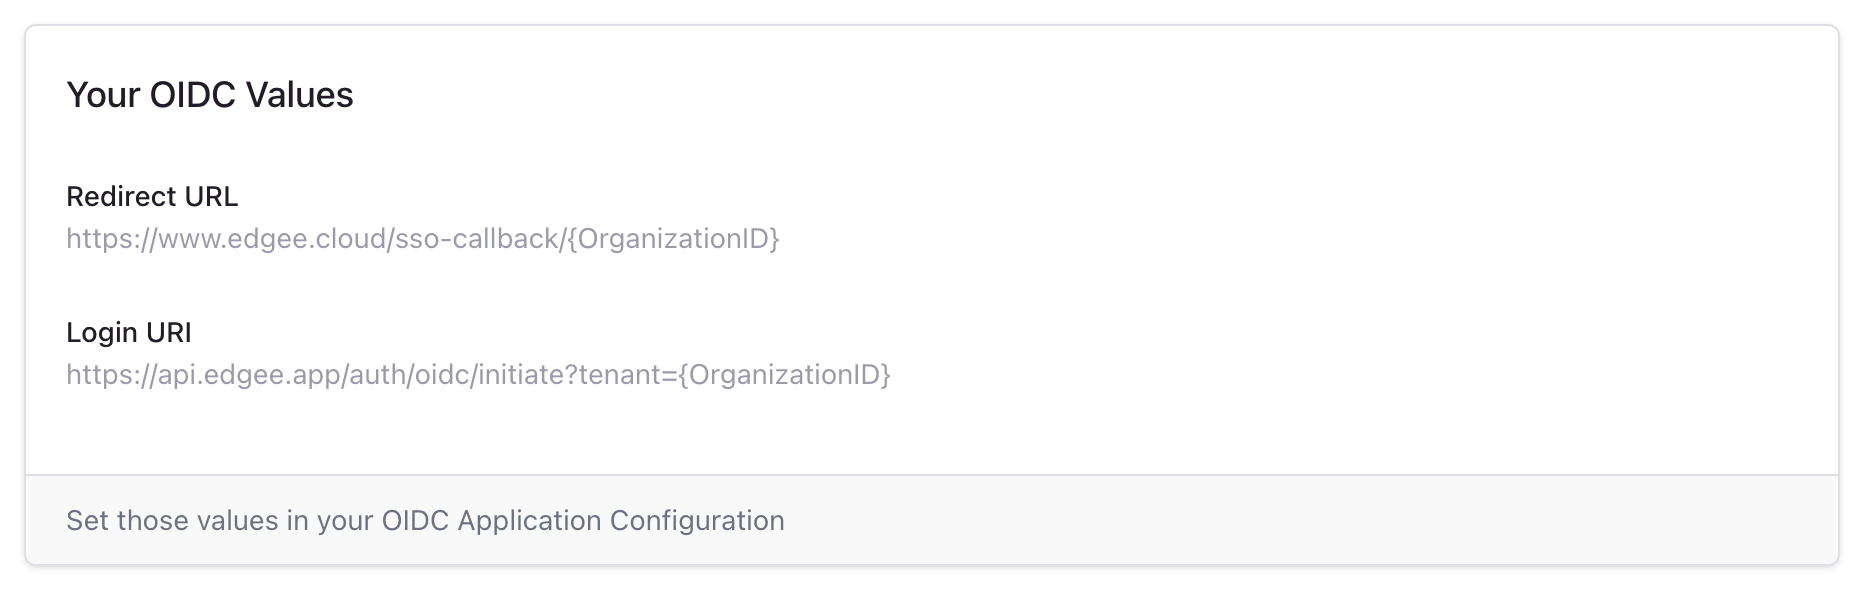
Where to find the OIDC values to configure your OIDC provider. Click on the image to zoom in.
Edgee Console configuration
Back in the Edgee console, you need to configure the OIDC settings for your organization using your OIDC provider info.- Click the Activate OIDC button.
- Enter the following information:
- Issuer URL: The URL of your OIDC issuer (e.g. Okta or Auth0).
- Client ID: The client ID for your OIDC provider.
- Client Secret: The client secret for your OIDC provider.
- Click Submit to save your changes.
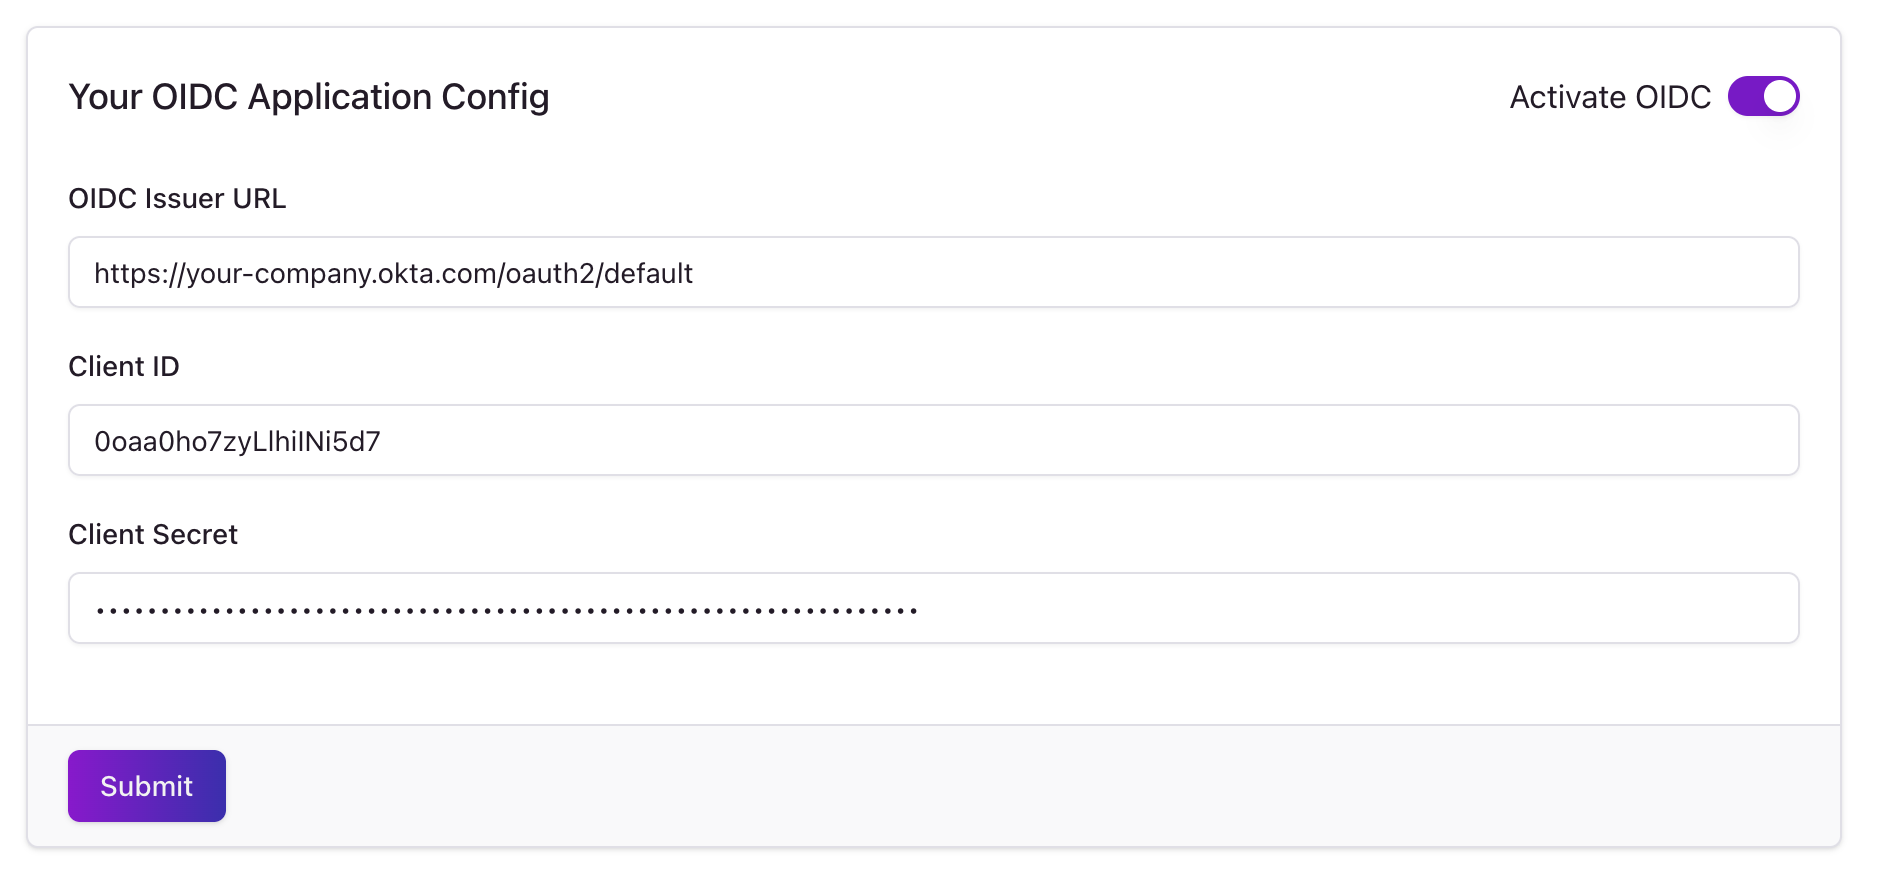
How to configure your OIDC application on Edgee. Click on the image to zoom in.
Member and automatically log in.